
Table of Contents Best WooCommerce Product Filter Plugins Why Use WooCommerce Product Filters? Benefits of…
How to Add Custom Fields to WooCommerce Products (Step-by-Step Guide)
Table of Contents
- What Are Custom Fields in WooCommerce?
- Why Use Custom Fields in WooCommerce?
- Methods to Add Custom Fields
- Display Custom Fields on the Product Page
- Conclusion
- FAQs
If you’re running a WooCommerce store, you may want to add extra product details like manufacturer, warranty info, or custom messages. This is where custom fields come in.
Let’s learn how to add them step-by-step.
What Are Custom Fields in WooCommerce?
Custom fields are extra pieces of data you can add to your products. These fields are not shown by default in WooCommerce. You can use them to show more product information to customers.
Why Use Custom Fields in WooCommerce?
Here are some benefits of using custom fields:
- Display extra product specifications (e.g., materials, dimensions)
- Add notes or special instructions
- Provide technical information
- Make product pages more informative and helpful
Methods to Add Custom Fields
You can add custom fields in two main ways: using a plugin or adding code manually.
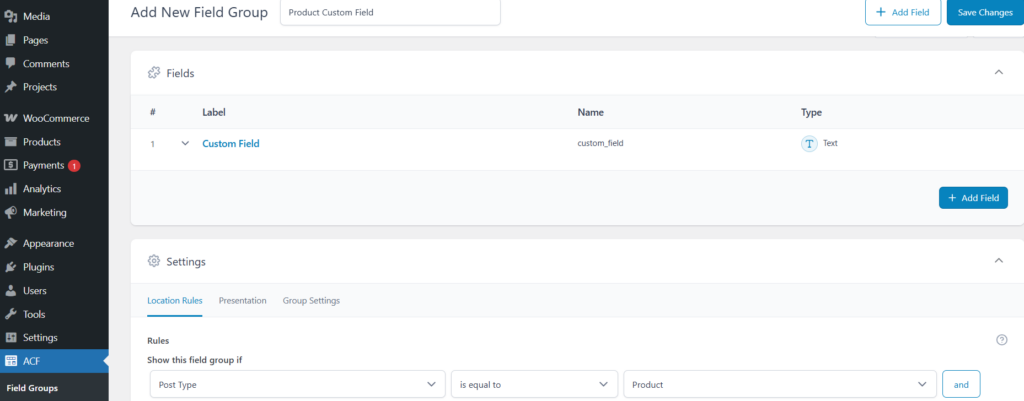
Using a Plugin (ACF – Advanced Custom Fields)
- Install and activate the Advanced Custom Fields plugin.
- Go to Custom Fields > Add New.
- Create a field group and add the fields you want.
- Set display rules to show the fields on WooCommerce products.
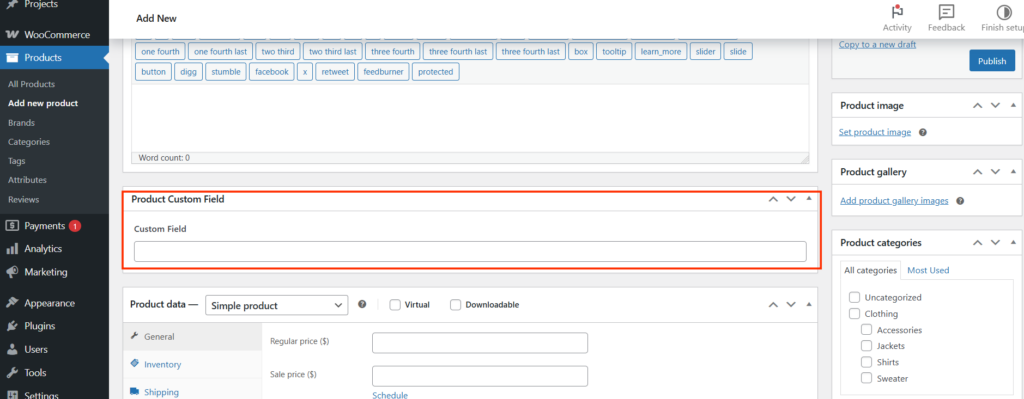
- Now, when you edit a product, you’ll see the new custom fields.
Using Code in functions.php
This method is for users who are comfortable editing code.
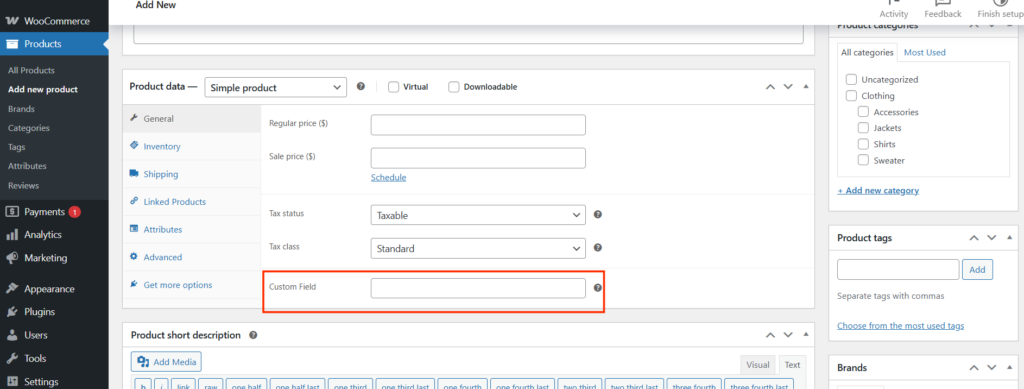
Add Field to Product Editor:
add_action('woocommerce_product_options_general_product_data', 'add_custom_field_to_products');
function add_custom_field_to_products() {
    woocommerce_wp_text_input([
        'id' => '_custom_text_field',
        'label' => __('Custom Field', 'woocommerce'),
        'desc_tip' => true,
        'description' => __('Enter custom text for this product.', 'woocommerce'),
    ]);
}
Save Custom Field:
add_action('woocommerce_process_product_meta', 'save_custom_field');
function save_custom_field($post_id) {
    $custom_field = $_POST['_custom_text_field'] ?? '';
    if (!empty($custom_field)) {
        update_post_meta($post_id, '_custom_text_field', sanitize_text_field($custom_field));
    }
}
Display Custom Fields on the Product Page
To display the custom field on the single product page, add this code:
add_action('woocommerce_single_product_summary', 'display_custom_field', 25);
function display_custom_field() {
    global $post;
    $custom_field = get_post_meta($post->ID, '_custom_text_field', true);
    if (!empty($custom_field)) {
        echo '<p class="custom-field">Custom Info: ' . esc_html($custom_field) . '</p>';
    }
}
This will show your custom field just below the product summary.
Conclusion
Adding custom fields is a great way to enhance product information on your WooCommerce store. You can use a plugin like ACF for a no-code solution or add PHP code for full control. Either way, custom fields help provide a better shopping experience.
FAQs
Do I need coding skills to add custom fields to WooCommerce products?
No, you don’t need coding skills. You can use a plugin like Advanced Custom Fields (ACF) to add custom fields without writing any code.
Can I add custom fields to all WooCommerce products?
Yes, you can add custom fields to all products. Most plugins, including ACF, allow you to set rules to apply custom fields to specific product categories or all products.
Will customers see custom fields on the shop page?
By default, custom fields are visible only on the single product page. However, with custom coding, you can choose to display them on the shop or archive pages too.
Is it safe to edit the functions.php file to add custom fields?
It’s recommended to use a child theme or create a custom plugin for any code changes. This keeps your changes safe from being overwritten during theme updates.
Do custom fields improve SEO for WooCommerce products?
Yes, they can improve SEO indirectly by enhancing user experience, providing more detailed product information, and reducing bounce rates.
Related Posts


This Post Has 0 Comments