Table of Contents Overview Ultimate Auction Pro Auctions Made Easy for WooCommerce Auctions for WooCommerce…
How to Create a WordPress Plugin Step-by-Step
Table of Contents
- Overview
- Step 1: Configure Your Environment for Development
- Step 2: Create a Plugin Folder and File
- Step 3: Add Plugin Header Information
- Step 4: Write Your Plugin’s Functionality
- Step 5: Activate Your Plugin
- Step 6: Test Your Plugin
- Step 7: Debugging and Optimization
- Step 8: Prepare for Distribution (Optional)
- Additional Resources
- FAQ
Overview
With the help of WordPress plugins, you may enhance your WordPress website’s operation and add new features. Whether your objectives are to improve user experience, interface with external services, or alter WordPress behavior, developing a plugin is an excellent method to get there. This tutorial will help you create a basic WordPress plugin from the ground up.
Step 1: Configure Your Environment for Development
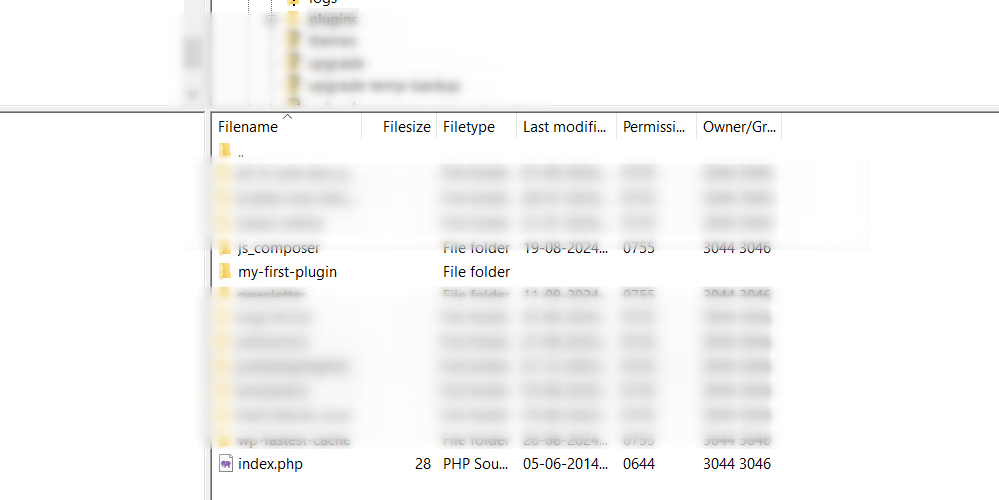
Make sure you have a development environment set up before you begin coding. What you’ll need is
- WordPress Installation: A staging or local WordPress website where your plugin can be tested.
- Code Editor: An editor such as PHPStorm, Sublime Text, or Visual Studio Code.
- FTP/SFTP Access: In case you need to upload files to your WordPress installation.
Step 2: Create a Plugin Folder and File
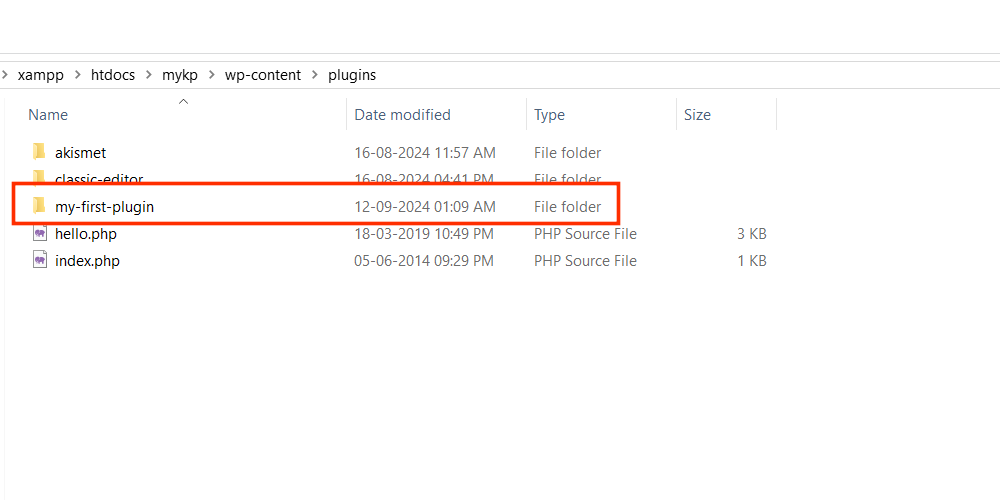
- Navigate to the Plugins Directory: On your local WordPress installation, go to
wp-content/plugins. - Create a New Folder: Name it something unique to your plugin, e.g.,
my-first-plugin. - Create the Main Plugin File: Inside your plugin folder, create a PHP file with the same name as your folder, e.g.,
my-first-plugin.php.
Step 3: Add Plugin Header Information
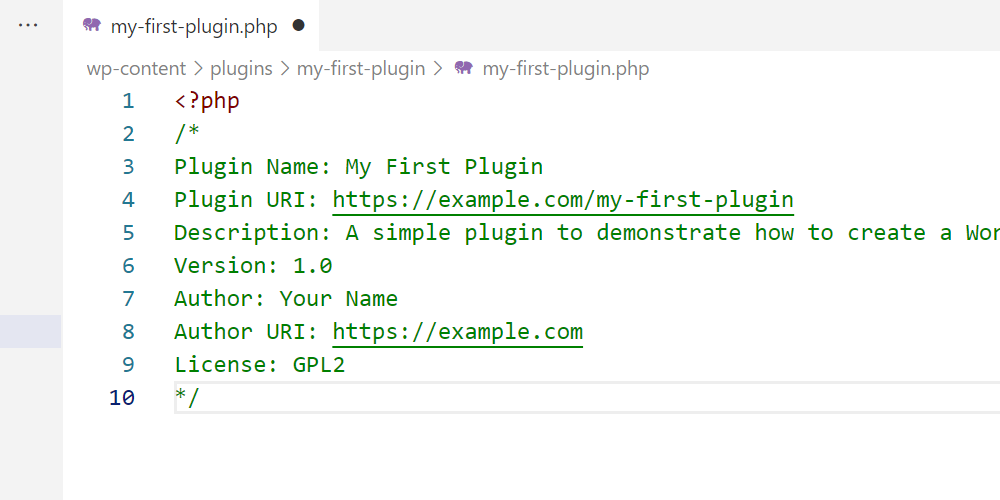
Open your my-first-plugin.php file and add the following code:
<?php
/*
Plugin Name: My First Plugin
Plugin URI: https://example.com/my-first-plugin
Description: A simple plugin to demonstrate how to create a WordPress plugin.
Version: 1.0
Author: Your Name
Author URI: https://example.com
License: GPL2
*/
This header information provides WordPress with details about your plugin.
Step 4: Write Your Plugin’s Functionality
Decide on the functionality of your plugin. For this example, let’s create a simple plugin that adds a custom message to the end of each post.
Add the following code below the header information:
// Hook function to the 'the_content' filter
add_filter('the_content', 'my_custom_message');

function my_custom_message($content) {
    // Check if we're inside a single post
    if (is_single()) {
        $content .= '<p>This is a custom message added by My First Plugin!</p>';
    }
    return $content;
}
This code uses the the_content filter to append a custom message to the end of each post.
Step 5: Activate Your Plugin
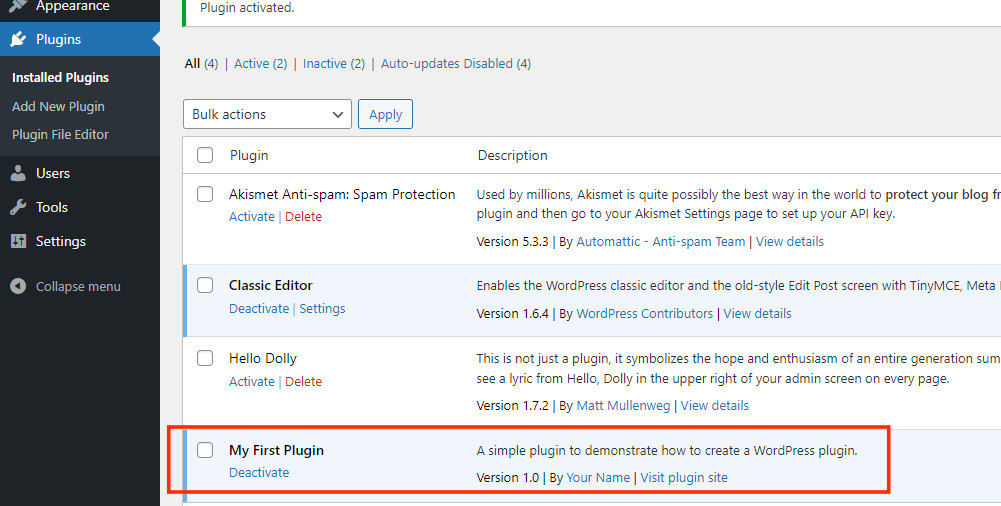
- Go to Your WordPress Admin Dashboard: Navigate to
Plugins > Installed Plugins. - Find Your Plugin: You should see “My First Plugin” listed.
- Activate It: Click the “Activate” link to activate your plugin.
Step 6: Test Your Plugin
Visit a single post on your site to see if the custom message appears at the end. If it does, your plugin is working correctly!
Step 7: Debugging and Optimization
- Check for Errors: Look for any PHP errors or notices.
- Optimize Code: Ensure your code is efficient and follows best practices.
- Security: Validate and sanitize user inputs if your plugin involves user interaction.
Step 8: Prepare for Distribution (Optional)
If you plan to share your plugin with others, consider the following:
- Add Readme File: Create a
readme.txtfile with details about your plugin for WordPress.org repository. - Code Documentation: Add comments and documentation to your code for clarity.
- Versioning: Follow semantic versioning for updates.
Additional Resources
FAQ
What is a WordPress plugin?
A WordPress plugin is a piece of software that extends the functionality of your WordPress site. It allows you to add features, improve user experience, and integrate with external services.
Do I need coding experience to create a plugin?
Basic knowledge of PHP and WordPress functions is helpful, but this tutorial is designed for beginners and walks you through the essential steps.
What development environment do I need?
You’ll need a local or staging WordPress installation, a code editor (like PHPStorm, Sublime Text, or Visual Studio Code), and FTP/SFTP access if you plan to upload files.
What should I include in the plugin header?
The plugin header provides WordPress with essential details about your plugin, including the name, URI, description, version, author, and license. This is crucial for proper recognition in the admin dashboard.
How do I activate my plugin?
After creating your plugin, go to the WordPress admin dashboard, navigate to Plugins > Installed Plugins, find your plugin, and click the “Activate” link.



This Post Has 0 Comments