Table of Contents Overview Ultimate Auction Pro Auctions Made Easy for WooCommerce Auctions for WooCommerce…
How to Create and Manage WordPress Menus Effectively
Table of Contents
- Overview
- What Are WordPress Menus?
- How to Create a WordPress Menu
- How to Manage and Edit WordPress Menus
- How to Add Custom Links to WordPress Menus
- How to Create Dropdown Menus
- How to Manage Menu Locations
- How to Use Widgets for Custom Menus
- How to Set Up a Mega Menu for E-commerce Websites
- Tips for Creating Effective WordPress Menus
- FAQ
Overview
WordPress menus help you organize your website and improve navigation for visitors. A clear, well-structured menu can enhance the user experience and reduce bounce rates. In this guide, you will learn how to create and manage WordPress menus step by step.
1. What Are WordPress Menus?
WordPress menus are navigation tools that help users explore your website. These menus typically include links to:
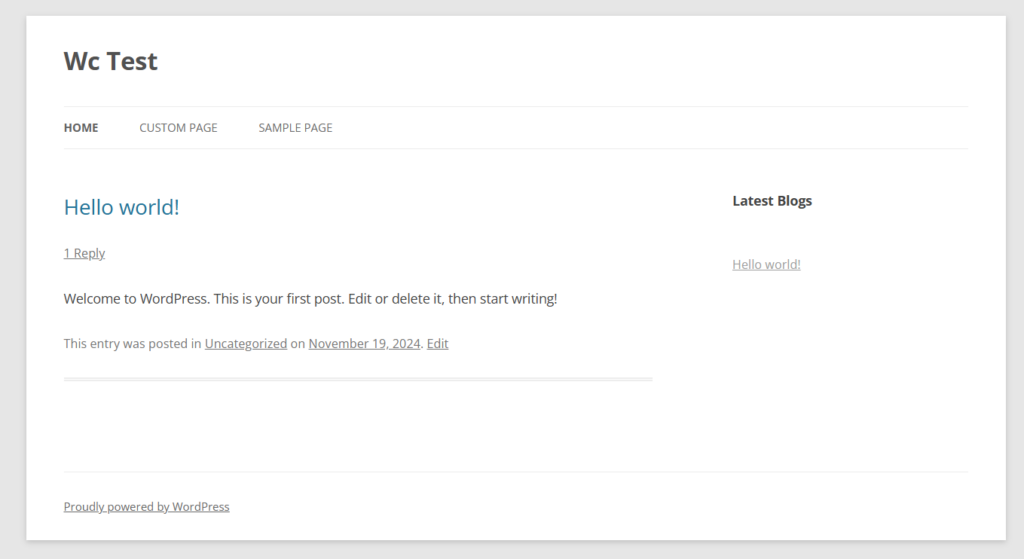
- Home Page
- Blog Posts
- Categories
- Contact Page
- Custom Links
Menus are usually placed in the header, footer, or sidebar areas of your website.
2. How to Create a WordPress Menu
Follow these easy steps to create a menu:
Log in to WordPress Admin Panel
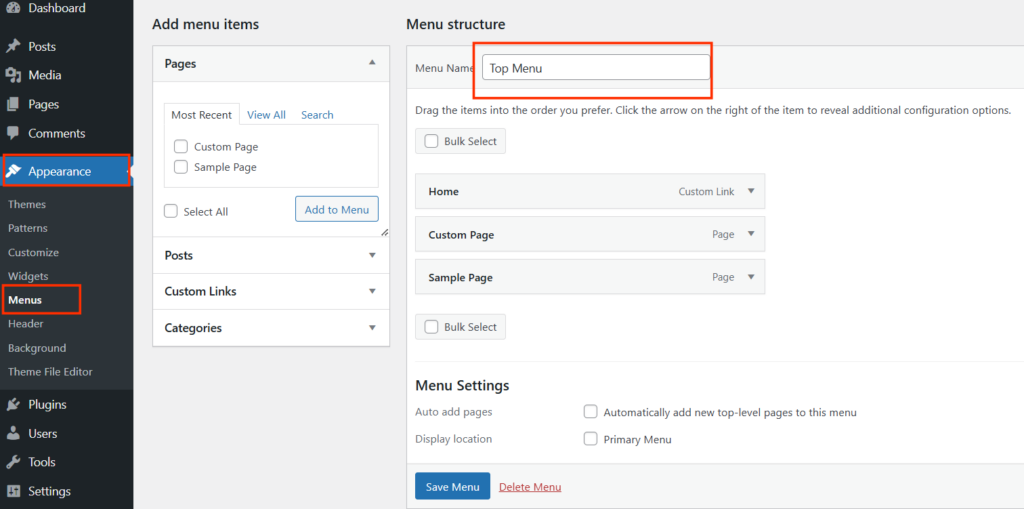
Go to Appearance > Menus in the dashboard.
Create a New Menu
- Click on Create a new menu at the top.
- Enter a name for your menu, such as “Main Menu,” and click Create Menu.
Add Items to the Menu
- On the left, you will see sections like Pages, Posts, Custom Links, and Categories.
- Check the items you want to add to the menu.
- Click Add to Menu.
Organize Your Menu
- Drag and drop the menu items to reorder them.
- Use the indent feature to create sub-menus (dropdowns).
Assign the Menu Location
- Scroll down to the “Menu Settings.”
- Check the location where you want the menu to appear, such as Primary Menu.
Save Your Menu
Click the Save Menu button to publish the changes
3. How to Manage and Edit WordPress Menus
Editing menus is simple in WordPress. Follow these steps:
Go to Appearance > Menus
Select the menu you want to edit.
Edit Menu Items
- To remove a menu item: Click the down arrow next to the item and select Remove.
- To rename an item: Edit the Navigation Label.
Add New Items
You can add pages, posts, or custom links to update the menu.
Reorganize the Structure
Drag and drop items to change their position.
Save Your Changes
Click Save Menu after editing.
4. How to Add Custom Links to WordPress Menus
Custom links let you link to external websites or specific pages. Here’s how:
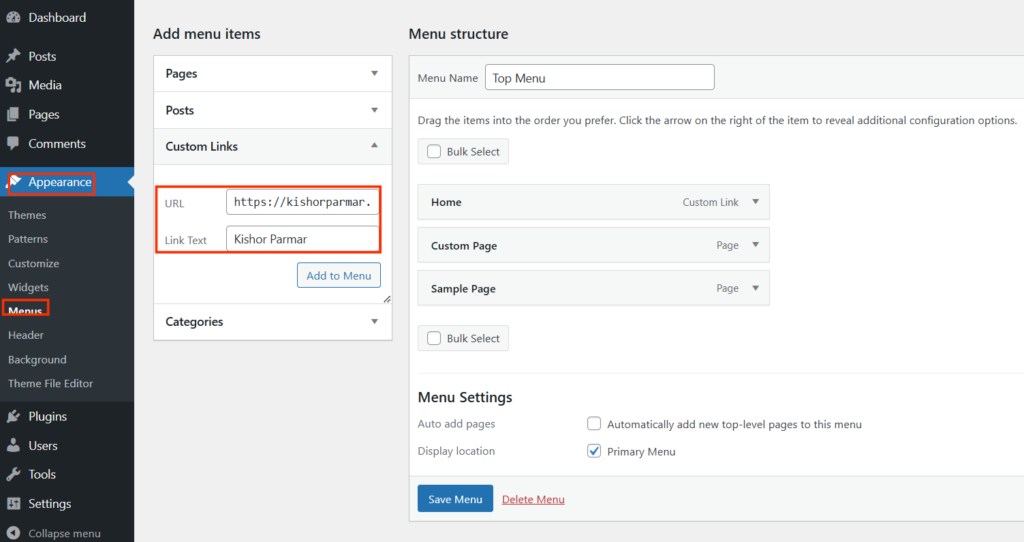
- Go to Appearance > Menus.
- In the left panel, click Custom Links.
- Enter the URL (e.g., https://example.com) and a Link Text.
- Click Add to Menu.
- Save the menu.
5. How to Create Dropdown Menus
Dropdown menus help you display subcategories or nested links. Follow these steps:
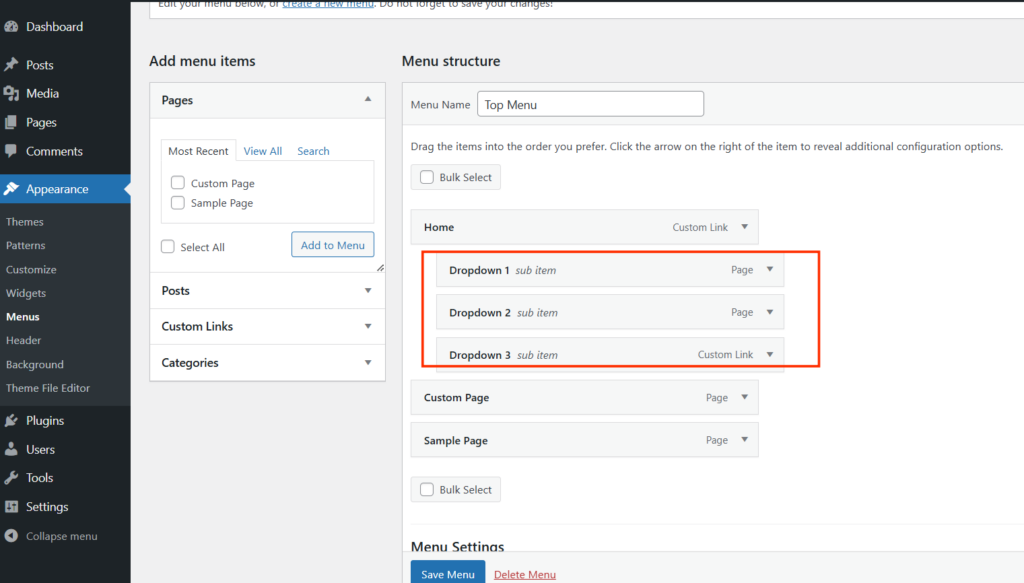
- Add the parent and child items to the menu.
- Drag the child item slightly to the right under the parent item.
This creates an indent to show it as a sub-menu. - Save the changes.
Your visitors will now see a dropdown menu when they hover over the parent item.
6. How to Manage Menu Locations
WordPress themes usually have multiple menu locations. Common ones include:
- Primary Menu (Header)
- Footer Menu
- Sidebar Menu
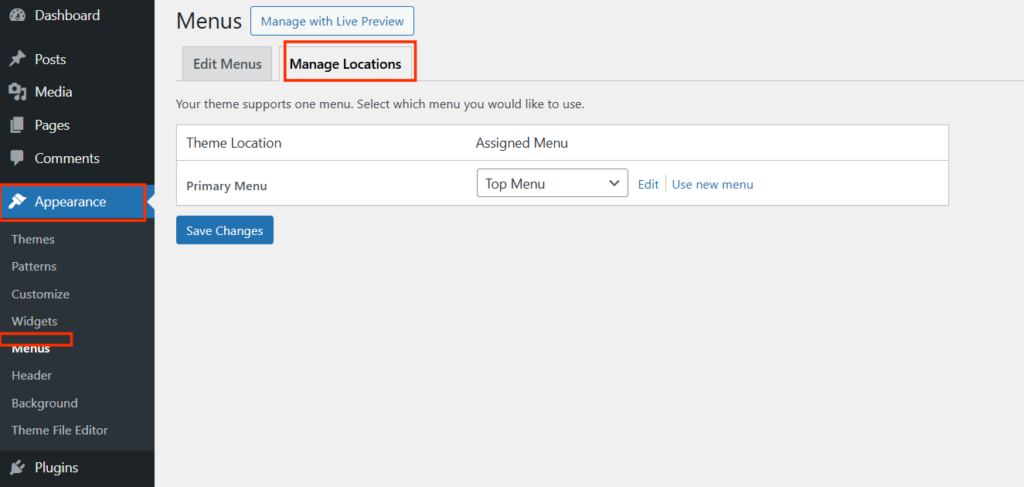
To manage locations:
- Go to
Appearance > Menus. - Click on the
Manage Locationstab. - Assign a menu to each location.
- Save the changes.
7. How to Use Widgets for Custom Menus
Widgets allow you to display menus in the sidebar or footer.
- Go to
Appearance > Widgets. - Drag the Navigation Menu widget to your desired area.
- Select the menu you created.
- Save the widget.
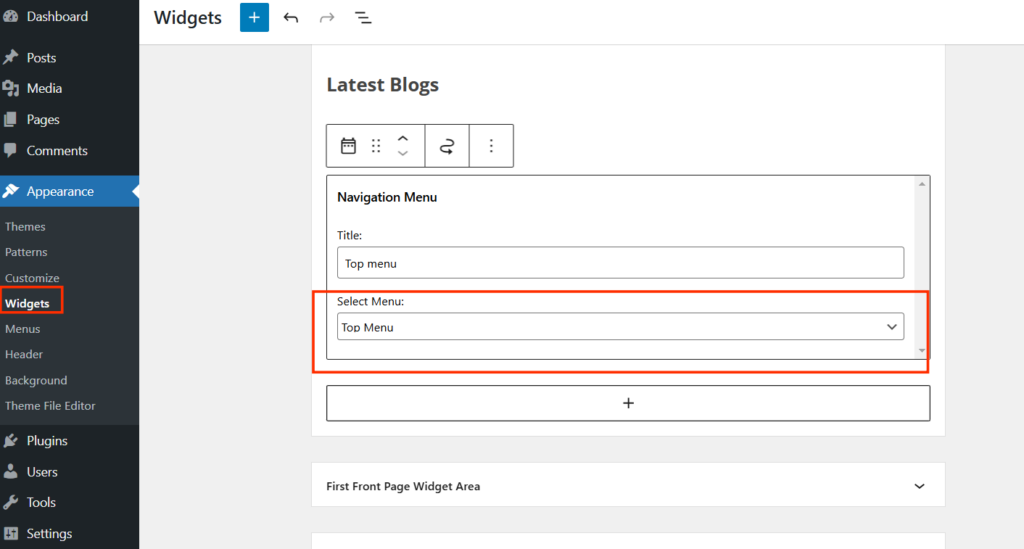
Now, your custom menu will appear in the sidebar or footer.
8. How to Set Up a Mega Menu for E-commerce Websites
Mega menus are ideal for e-commerce websites with multiple categories and products. They provide an organized, visually appealing navigation experience.
Steps to Set Up a Mega Menu in WordPress:
- Choose a Mega Menu Plugin Install a plugin like Max Mega Menu or WP Mega Menu. These plugins are user-friendly and compatible with most themes.
- Install and Activate the Plugin
- Go to your WordPress dashboard.
- Navigate to Plugins > Add New.
- Search for the desired plugin and click Install.
- Activate the plugin.
- Assign Menu for Mega Menu Configuration
- Navigate to Appearance > Menus.
- Select the menu you want to convert into a mega menu.
- Enable Mega Menu for a Specific Item
- In the menu editor, click on the settings for the parent menu item.
- Check the option to enable the mega menu.
- Configure columns, layout, and style as per your requirements.
- Add Content to Mega Menu
- Add subcategories, product links, images, or custom widgets.
- Use drag-and-drop functionality for easy organization.
- Customize the Design
- Use the plugin’s design options to style the mega menu.
- Set background colors, font styles, and hover effects.
- Test Your Mega Menu
- Preview your site and test the mega menu for usability.
- Ensure it works on both desktop and mobile devices.
Benefits of Using a Mega Menu for E-commerce
- Provides a clear overview of product categories.
- Enhances user experience with quick navigation.
- Supports adding visuals like images and promotional banners.
- Ideal for large websites with complex navigation structures.
9. Tips for Creating Effective WordPress Menus
- Keep It Simple: Avoid adding too many items.
- Organize Content: Use dropdowns or mega menus for subcategories.
- Add Important Links: Include Contact, Blog, and About pages.
- Mobile-Friendly: Ensure menus work well on mobile devices.
- Test Your Menu: Check links and navigation before publishing.
Conclusion
Creating and managing WordPress menus is easy and essential for website navigation. By following the steps in this guide, you can create organized menus that improve user experience. Keep your menus clean, simple, and mobile-friendly to make your website easy to explore.
Start creating your WordPress menu today and help your visitors find what they need quickly!
FAQ
What are WordPress menus, and why are they important?
WordPress menus are navigation tools that help users explore your website. They improve user experience and make your site easier to navigate.
How do I create a new WordPress menu?
Navigate to Appearance > Menus, create a new menu, add items, organize them, assign a location, and save.
Can I add external links to my WordPress menu?
Yes, use the Custom Links option in the menu editor to add external URLs.
How can I create a dropdown menu in WordPress?
Indent sub-items under a parent item in the menu editor to create a dropdown.
What are menu locations in WordPress?
Menu locations are theme-defined areas where you can display menus, such as the header or footer.
How do I add a menu to a sidebar or footer?
Use the Navigation Menu widget under Appearance > Widgets to display menus in these areas.




This Post Has 0 Comments